How to buy a Secret Network (SCRT) NFT - By Yaro-the-Cosmodiver
Yaro-the-Cosmodiver demonstrates how someone can use Keplr to buy Secret NFTs from Cosmos or Ethereum.
Disclaimer - This is part of our outside perspective series. Curious Cosmonaut Research is not the author we are simply highlighting some good threads and perspectives on the Cosmos ecosystem with their permission. We also, therefore, do not guarantee their accuracy.

Author: Yaro-the-Cosmodiver
Source: Blog
Date: March 15, 2022
How to buy a Secret Network (SCRT) NFT.
The essential short guide.
Since you’re already here, I’m assuming you already know why SCRT NFTs are going to be huge. And you’re probably an Etherum user. This guide will explain how to buy your first SCRT NFT in 20 minutes or less.
1. Get Keplr
2. Get SCRT
3. Get NFT
(If you want more details, there’s an extra notes annex).
1. Get Keplr.
a) Download Chrome. Make sure you’re using Google Chrome as it has the greatest amount of compatibility across wallets and apps.
b) Download Keplr. Go to Keplr’s extenson download page for Chrome and click [Add to Chrome].
⚠️Only download Keplr extension from the official Chrome web link.⚠️

In the following window pop-up, select [Add extension] and it will be automatically added to your Chrome browser.
c) Create a Keplr account. Clicking on the Keplr browser icon for the first time will take you to the accounts setup page.

Choose option [Create new account] and select 24 word seed phrase (extra security over 12 word).
⚠️Store your seed phrase offline (if you ever type it into a document or copy it consider it at risk of compromise forever) and never, ever input it to any websites!⚠️

Enter a name for your account and password (you can change these later) & click on [Next].
To confirm the creation of this new account, you’ll need to click on words in the order in which they appear in your seed/mnemonic phrase and press [Register]. You now have a Keplr account! Go to step 2 — Get SCRT.
2. Get SCRT.
The three ptions covered in this guide, from easiest to hardest are:
Option one: Using fiat through SecretSwap. It’s the easiest method, but will also cost the most in fees.
Option two: Using a CEX. Easy if you already hold a CEX account, but you’ll have to pay some fees to the CEX (boo).
Option three: Using the SCRT-ETH bridge and button swap. The best method for someone comfortable with cryptocurrency and DeFi. Low fees, but a bit more work (especially for a first time SCRT user).
Option one: Using fiat through SecretSwap.
a) The only step. Using Chrome, navigate to the buy page on SecretSwap. If you’re not signed into Keplr yet, it’ll ask you to do so. The rest is pretty much “press button, receive bacon”. Go to Step 3 — Get NFT.
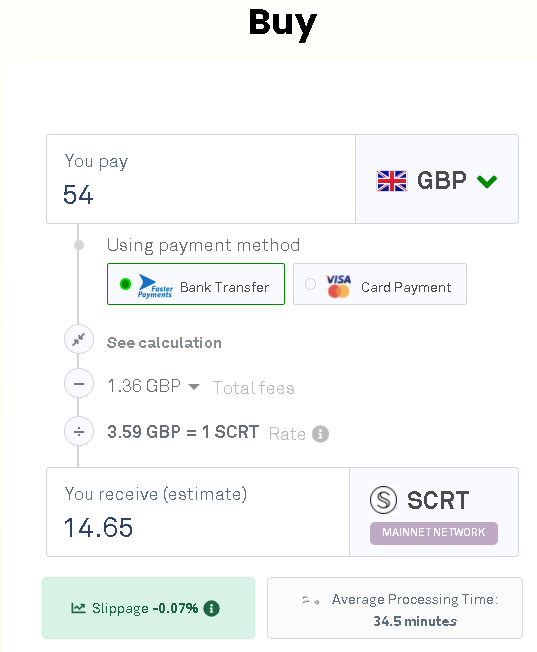
After a 30-ish minute wait, your SCRT account will receive funds.
Option two: Using a CEX.
a) Swap for SCRT. If your CEX has SCRT just… buy SCRT. (If it doesn’t, it’ll be easier to avoid using a CEX and go to option 3.)
b) Get your SCRT address.

Open your Keplr Google Chrome extension and select Secret Network, then click on your address to copy it.
c) Send your SCRT. Send your newly obtained SCRT to this address. It’ll be almost instantaneous. Go to step 3 — Get NFT.
Option three: Using the SCRT-ETH bridge and Button Swap.
Yes, this method is more complicated, but after the first time it’ll be much easier than using FIAT or a CEX. Note: requirements for a first time user: Twitter & Metamask.
a) Optional — obtain a tiny bit of SCRT. If you’ve already got some SCRT in your Keplr wallet, skip ahead to b). Otherwise, to receive a tiny amount of SCRT use the stakely validator faucet. This will involve making a tweet (if you’re not paying for something, you’re the product!). you’ll need these few cents worth of SCRT soon to pay for viewing permits.
b) Connect to SecretSwap. Navigate to the SecretSwap bridge.

Connect your Metamask and Keplr.
c) Swap ETH for sETH. This step will make your Ethereum usable on the Secret Network.

Select ETH as your token, enter the amount of ETH to bridge into sETH and Click [Use my address]. Select [Bridge to Secret Network] and go through the approvals to create the smart contract.
Congratulations, your ETH is now on the Secret Network as sETH. Because it is private, you will have to give websites and apps permission to view it with a one-time 5c transaction — hence the faucet use in step a). On Secret Swap this is done by clicking [create a viewing key].
d) Swap sETH for SCRT. Navigate to the Button Swap website (This app is awesome because it automatically searches for the most efficient conversion paths). You’ll have to allow Buttonswap to connect to your Keplr.

Select sETH as the source, select SCRT as your destination and enter the sETH amount. Note how Button Swap will begin searching for the best swap path.
Once a path has been selected, select [swap] and approve the transaction. Congratulations, you’ve now bridged your Ethereum to SCRT! Go to step 3 — Get NFT.
3. Get NFT.
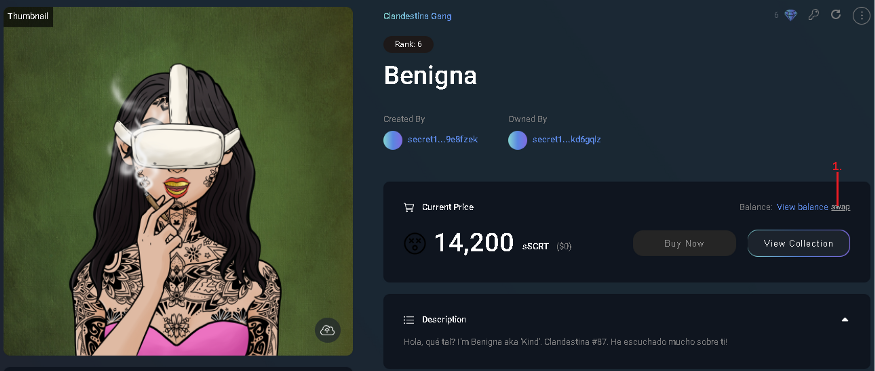
a) Find your NFT. Navigate to Stashh.io on Chrome and make sure you’re signed into your Keplr account. Search for an awesome collection such as:
b) sSCRT. Once you’ve found your new true love, you’ll notice that the price is in sSCRT. sSCRT is the private version of SCRT, meaning that transactions are not traceable and ownership of NFTs remains anonymous unless otherwise authorized. Pretty cool, huh?

Click [swap] to convert your SCRT to sSCRT. After entering the amount and clicking [swap], you’ll be asked to approve the swap contract — something like 40c. Just use the Average fees, and click [approve].
c) Allow Stashh to see your balance. So, you now have sSCRT. But Stashh can’t see it, because as was said earlier, you’ll need to give it permission.

Click on [view balance], and then [submit] to add sSCRT viewing keys to your Keplr, and lastly pay the 5c or so by clicking [approve] to give Stashh privileges to view your sSCRT balance. You’ll only ever have to do this once.
d) Doing the deed. Alright! That’s it — you’ve got sSCRT. Just click [BUY] on the SCRT NFT of your choice, go through the contract approvals and… voila! You’re now a SCRT NFT owner and GMI.
If this guide has helped you, tips in SCRT are welcome as I am nowhere near a Lambo yet :( secret1x8ja8p3zz2e0x4u8058scajjn3wcld5mzdaqkk. For any updates to this guide, or just for my spam opinions feel free to follow me on Twitter: @cosmodiver.
The extra stuff:
NFT Viewing:
Now that you’ve bought your NFT, you probably want to view it. The very first time you do so on Stashh, you’ll have to do the following three actions:
1. Click on your profile icon in the top right
2. Click [Authenticate]
3. Approve the contract request for Stashh to recognize your wallet.
Then, every time you buy into a new collection, you’ll have to give Stashh permission to view that collection in your wallet by doing the following steps:
1. Click on your profile icon in the top right
2. Click [dashboard]
3. Click [Add Collection] on the right hand side of the screen
4. Search for the collection you bought into, select it and click [Create Permit for this collection]
5. Click [Approve] to give Stashh viewing privileges.
Note: many top-tier collections will also have their own websites with extra features such as private metadata, details how to join the DAO and rarity tables. For full functionality, these websites will often ask to connect to your wallet and view your NFT collection. ie:
Minting NFTs
So, you’ve found a sweet mint coming you to be part of... Maybe you used the Secret Calendar? To mint an NFT you’ll need to have sSCRT in your Keplr. Without using Stashh, you can swap SCRT for sSCRT using Keplr’s desktop app.